House construction
House construction stages in Lithuania: from plot to move-in
Building a detached house in Lithuania in 17 stages: needs, plot, design, building permit, construction, building services and completion.
Building a house is not one big job but a long chain of decisions. You will make some of them before you even own a plot, some of them standing on the building site, and you will only see the consequences of a few of them years later. This guide puts the whole process in chronological order: from your household's needs and financial limits to completing construction and the first year of looking after the house.
The guide is written for someone building a typical, non-complex detached house in Lithuania for the first time. For each stage you will find what happens, which decisions you will face, what to prepare before moving on and where people most often go wrong. It follows the same 17-stage plan that Etapai uses in its detached-house template. Lithuanian names of key documents and institutions are given in brackets, because those are the terms you will meet in practice.
How to read this guide
This is an overview of the process, not legal advice, a design or a construction manual. The documents, procedures and technical solutions required for a specific house depend on the laws in force, the approved design, manufacturers' instructions and the conditions of the plot. Qualified specialists always confirm them.
The whole process at a glance
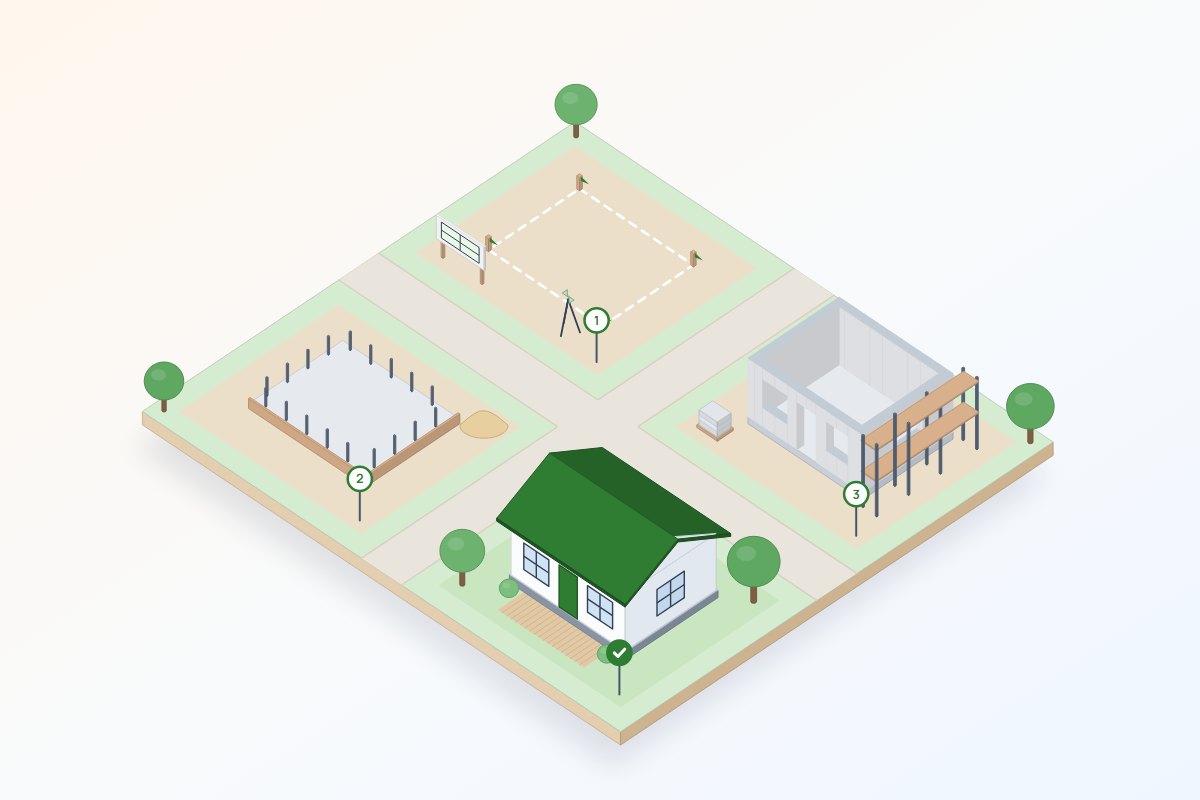
The stages fall into four parts. The first two – planning and design – often take longer than expected, but they are when changing your mind costs least. Once groundworks start, every change becomes more expensive, because something already built has to be removed or adapted.
All stages
Etapai
Use this plan on the Etapai.lt platform
The Etapai.lt platform includes a ready-made Lithuanian detached-house template with the same 17 stages. Create a project, choose the point in the build you are starting from, and keep tasks, deadlines, responsible people and documents in one place.
Planning and the plot
Stage 1: Needs and financial capacity
Before looking for a plot or a design, agree on what kind of house you actually need and how much financial risk your household can take on. Write down your current and future needs: how many people will live there, whether you will work from home, how much storage, parking, terrace space or how many outbuildings you need. Separate the must-haves from the nice-to-haves; it will help you control floor area and cost later.
Judge your finances by the cost of the whole project, not by an imagined price per square metre: the plot, design, surveys, utility connections, construction, interior fit-out, landscaping and the cost of financing. Most builds end up costing more or taking longer, so set aside a reserve of both money and time from the start.
Key decisions
- what size and layout of house fits your household now and in 10–15 years;
- how much you can put in from your own funds and how much you would need to borrow;
- whether you will build in one go or in phases, and at which point the house must be weather-tight.
Before moving on
- have a list of priorities you can show to an architect and to a plot seller;
- know the rough budget limits for the whole project and keep a separate reserve for the unexpected;
- if you plan to take a loan, check the bank's conditions before buying a plot.
About construction loans
The Bank of Lithuania notes that a home loan for construction is usually paid out in instalments rather than all at once, as the value of the property under construction grows. That is why you often need your own money at the start, for example for the plot or the first works. Check the exact conditions with your bank.
Stage 2: Finding, checking and buying a plot
A good plot is about more than location and price. Before you buy, check whether the house you want can be built there at all: the land's purpose and use, what the territorial planning documents allow (the general or detailed plan, bendrasis or detalusis planas), and which special land-use conditions (specialiosios žemės naudojimo sąlygos) and servitudes apply. These can restrict where the house may stand, how tall it may be, how much of the plot it may cover, or whether building is allowed at all.
Check the legal data in an extract from the Real Property Register (Nekilnojamojo turto registras) and the planning information in the register of territorial planning documents. The physical reality matters just as much: is there legal and physically usable access, where do the electricity, water and sewer networks run, what are the ground and moisture conditions, and what is happening around the plot? Visit it at different times of day and year.
If there is no legal access, it may have to be secured with a servitude. The National Land Service (Nacionalinė žemės tarnyba) explains that a servitude is established by an administrative act, by agreement between the parties or by a court decision, and only where it is objectively necessary. This takes time, so resolve it before you buy.
Key decisions
- which criteria are essential (location, size, orientation, access) and where you can compromise;
- whether the results of your checks allow you to buy, or whether you need further expert opinions;
- which conditions to put in the contract and how much to reserve for unexpected connection or site-preparation work.
Before moving on
- have the register extract, extracts from the planning documents and information on servitudes and special conditions;
- find out how the house can be connected to the electricity, water and sewer networks, or what the local alternatives are;
- complete the purchase with a notary and take over all available information about the plot: boundary plans, earlier surveys and agreements with network operators.
Common mistake
Paying a deposit or signing a preliminary agreement before checking that a house of the size you want can be built on the plot. A restriction marked on a map is a reason to check, not a final conclusion – but "the seller said it's fine" is not a check either.
Design and preparation
Stage 3: The design team and initial data
The quality of the design shapes almost everything that follows, so choosing an architect is one of the most important decisions you will make. Look for someone who understands your priorities and the plot, defines the scope of their services clearly, and explains which other design parts and specialists (a structural engineer, building services designers) will be needed.
Reliable design needs reliable input data. Usually this means an up-to-date topographic plan prepared by a licensed surveyor and information about existing utility networks. Depending on the site, it may also include trees, level differences, neighbouring buildings, and noise or wind conditions.
Key decisions
- who will lead the design and which design parts and services the contract covers (for example, whether the architect will supervise the implementation of the design during construction);
- the order of decisions: when the concept, the design proposals and the technical design are approved;
- how changes will be agreed and what additional design work costs.
Before moving on
- sign a design contract with a clear scope, deadlines and deliverables;
- have an up-to-date topographic plan and the plot documents;
- give the designers your list of needs and budget limits so that they design within realistic means.
Stage 4: House concept and position on the plot
At the concept stage the house starts to take shape: where it will stand on the plot, how the rooms will be arranged and how the house will "live" together with the garden. Test everyday scenarios – how you come in with shopping, where you take off your boots, how you get to the terrace, where the car and the bins will go.
Orientation determines daylight, views, shading and summer comfort. Large areas of glazing facing south or west can overheat rooms if no shading is planned. This is also the time to decide your rainwater strategy: where water will be collected, how it will be carried away and where any overflow will go, because underground routes and foundation details depend on it.
Key decisions
- the position and orientation of the house on the plot, taking account of setbacks, servitudes, networks and terrain;
- the arrangement of rooms and how they connect, and the position of the terrace, entrances and parking;
- the main approach to rainwater and a possible location for solar panels on the roof.
Before moving on
- approve a concept that the architect can turn into design proposals;
- commission engineering geological (geotechnical) investigations where the house will actually stand – the structural engineer will design the foundations based on them.
Common mistake
Testing the ground "anywhere on the plot", or skipping the survey to save money. The foundation design depends on the ground under the future house; a surprise discovered during excavation costs far more than the survey.
Stage 5: Design proposals and the building permit document
The concept is developed into design proposals (projektiniai pasiūlymai, PP). They contain the main architectural, infrastructure, landscaping and other key solutions, but not yet the internal building services or detailed calculations. Since 1 November 2024, the document permitting construction (statybą leidžiantis dokumentas, SLD) has been issued on the basis of the design proposals, and the technical working design is prepared after the SLD.
Whether a particular house needs an SLD, and which procedures (such as public consultation or approvals) apply, depends on the category of the structure, its location and the applicable legal regime. The State Territorial Planning and Construction Inspectorate stresses that the correct category determines the required documents, the qualifications of the specialists and construction supervision. The designer assesses and confirms these points under the rules in force. Applications are submitted electronically through the territorial planning and construction portal.

Key decisions
- the final key solutions: the volume and height of the house, its position on the plot, facade materials, driveway and connections;
- which decisions are fixed now and which are left to the technical design.
Before moving on
- have approved design proposals and the SLD in hand (where one is required);
- find out which later changes are still possible without new procedures and which would count as material changes.
Stage 6: Technical working design and construction details
The technical working design (techninis darbo projektas, TDP) turns the design proposals into construction-ready solutions: structural calculations, building services, junction details and material specifications. Contractors price the work, buy materials and build from the TDP, so its level of detail directly affects both the cost and the number of mistakes on site.
Since the start of 2026, the technical working design and the design expert review can be submitted in parts when notifying the start of construction. This lets work begin earlier while other parts are still being prepared. But the design part needed for each job must be ready and approved before that job starts. Building "from the design proposals" is not the same as building from a technical design.
This is also when utility connections are worked out in detail. The electricity connection conditions are issued by ESO, the distribution network operator, and become part of the connection service agreement. If there are no public water or sewer networks, a local alternative is chosen. The Lithuanian Geological Survey states that every water well must be registered in the Register of the Earth's Interior. The Ministry of Environment reminds owners that wastewater discharged from individual treatment plants must be tested every year and that sludge must be removed regularly as the manufacturer specifies.
Key decisions
- which design parts, and what level of detail, your house needs;
- heating, ventilation, water and drainage, electrical and data solutions, which will determine the location of rooms, openings and service routes;
- if the TDP is prepared in parts, in what order the parts will be completed to match the construction schedule.
Before moving on
- before each work package, check that you have a valid, approved revision of that design part;
- cross-check the solutions in different design parts: pipes, ducts and cables must not clash with the structure or with each other.
The energy performance standard for new buildings
The Ministry of Environment states that since 2021 the energy performance class of newly built buildings must be no lower than A++. This affects not only insulation but also airtightness, ventilation with heat recovery and the share of renewable energy, so these solutions are worth coordinating at the design stage.
Stage 7: Financing, contracting strategy and preparation
Once the design is concrete, the early budget is replaced by a real cost estimate and a cash-flow plan. If you are building with a loan, agree the structure of the estimate and the payment stages with the bank.
At the same time you need to decide how the work will be organised: hiring a general contractor, separate contractors for separate packages, or coordinating the trades yourself. Each model trades off cost, responsibility and your own time. The more contractors there are, the more interfaces between their work you will have to manage.
Key decisions
- the contracting model and who is responsible for coordinating the different works;
- how you will compare offers: only like for like, with the same scope and assumptions;
- which construction participants are mandatory for your building (for example, a technical supervisor or a site manager) and which are worth having even when they are not.
Before moving on
- sign contracts with a clear scope, deadlines, payment stages, warranties and a procedure for changes;
- order long-lead items, such as windows or heating equipment, in good time;
- agree how changes will be approved and how covered-up work will be inspected before the next layers hide it.
Etapai
Use this plan on the Etapai.lt platform
The Etapai.lt platform includes a ready-made Lithuanian detached-house template with the same 17 stages. Create a project, choose the point in the build you are starting from, and keep tasks, deadlines, responsible people and documents in one place.
Main construction
Stage 8: Site set-up and groundworks
Before work starts on site, the applicable legal procedures have to be completed. Where an SLD is required, construction work may only begin once the notice of construction start has been registered in the Infostatyba information system. Check the requirements for appointing construction participants and documenting the works as well.
The site itself starts with setting out the house, access, temporary electricity and water, a storage area for materials and protection of the plot. It is worth stripping and keeping the fertile topsoil for later landscaping, and protecting trees and other valuable features.
Key decisions
- setting out the position and levels of the house according to the design;
- how access, material storage and temporary utilities will be organised;
- where excavated soil will be kept and how the topsoil will be preserved.
Before moving on
- make sure the notice of construction start has been registered (where required);
- compare the actual ground conditions with the geotechnical survey; if they differ, tell the structural engineer first.
Stage 9: Foundations and below-ground services
The foundations are built according to the structural design and the actual ground conditions. There is no going back from this stage, so before pouring concrete check all levels, reinforcement, openings for service entries and the damp-proofing details.
Below-ground services go in together with the foundations, under the floor and around the plot: water and drainage pipes, cable entries, land drainage and stormwater pipes. While the ground is still open, this is the cheapest moment to lay empty ducts for future needs – electric car charging, garden lighting, gates, irrigation or solar panels.
Key decisions
- the type of foundation and its insulation, based on the design, the ground and the building's structure;
- the locations of service entries and the routes of spare ducts;
- waterproofing and, where needed, land drainage.
Before moving on
- record covered-up work with photos and check measurements (and, where applicable, covered-work inspection records) before it is hidden;
- draw up or obtain an as-built plan of the underground routes – you will need it in the future;
- check the pipes and layers once more before the floor build-up.
Stage 10: Load-bearing structure
At this stage the walls, floors, stairs and other load-bearing elements go up. Before starting, accept the foundations: check their geometry, damp protection and embedded items. Fixing mistakes later is expensive.
During construction it is important to control geometry, the position and size of openings, reinforcement and how the structural elements connect. Window and door openings must match the design and the manufacturer's requirements – the quality of the window installation will depend on it.
Key decisions
- the chosen construction method and what it requires in terms of sequence and drying;
- how quality will be checked and who will sign off completion of the stage;
- whether openings and service penetrations match the technical design.
Before moving on
- accept the structural stage and record the actual dimensions;
- check the overall geometry before roof work starts.
Stage 11: Roof and rainwater
The roof completes the building's volume and protects the structure from moisture. Pitched and flat roofs have different layers, so before work starts, finalise the roof system, openings, roof windows, chimneys and any equipment planned on the roof, such as solar modules.
Rainwater solutions – gutters, downpipes, roof outlets and where the water finally goes – must be clear before the roof and facades are closed. Water from the roof must reach its intended destination safely: a stormwater network, an infiltration unit or a storage tank, not the foundations.
Key decisions
- the roof system and critical details: ridges, valleys, wall junctions and penetrations;
- how rainwater is collected and carried away, and the overflow route;
- safe access to the roof for future maintenance.
Before moving on
- check the hidden roof layers (vapour control, insulation, wind barrier) before they are covered;
- connect the rainwater system to the site drainage, or provide a temporary outlet.
Stage 12: An airtight, insulated building envelope
Windows, doors, insulation and facades have to work as one system that controls heat, air and moisture. Fitting a window is not just putting it in an opening: the installation plane, supports and sealing layers inside and out all matter. Windows also need protecting for the rest of the construction work.
Airtightness directly affects energy performance. According to the Construction Sector Development Agency (SSVA), an airtightness test is mandatory for A, A+ and A++ class buildings; it is carried out by accredited laboratories before energy certification and the completion of construction. That is why all junctions and penetrations are worth checking while they are still accessible.
Key decisions
- how windows and doors are installed and protected during construction;
- when to fit the final external doors so that heavy work does not damage them;
- the facade system and the details for everything fixed to the facade.
Before moving on
- check the continuity of the air barrier before interior finishes; an intermediate airtightness test helps find leaks while they can still be fixed;
- make sure all penetrations (pipes, cables, ducts) are sealed.
Building services, fit-out and completion
Stage 13: Internal building services
Electrics, data, water supply, drainage, heating and ventilation are installed in a coordinated way while the routes are still open. It pays to review all the systems together, so that one does not block another or clash with the structure.
Plan the electrical installation around the real furniture layout and future loads, with spare capacity for growth. Reserve cabling for data, security and automation in places where adding it later would be difficult. Choose the heating system according to the building's heat demand, and the ventilation according to the required airflows, noise and access for servicing.
Key decisions
- the heat source and distribution (for example underfloor heating or radiators) and whether cooling is needed;
- the location of the ventilation unit and plant room, with access for servicing;
- the location of the consumer unit, the data cabinet and the main equipment.
Before moving on
- carry out the required system tests (for example pipe pressure tests) before routes are covered;
- photograph and mark the location of all routes hidden in walls and floors.
Stage 14: Wet trades and internal substrates
Plaster, floor screeds and other wet trades bring a lot of water into the building, and it has to dry out. There is no single universal order for plastering and screeding – it depends on the chosen systems, the heating and the drying conditions.
Floor screeds are checked for levels, joints, heating circuits and residual moisture. Where underfloor heating is installed, it is usually commissioned and used to dry the screed following the procedure specified by the manufacturer or designer.
Key decisions
- the wet-trade sequence for your particular house, agreed with the contractors and the heating system;
- how ventilation and drying will be ensured, especially in the cold season.
Before moving on
- accept the wall and ceiling surfaces, corners and hidden elements before the final finishes;
- measure the moisture of the substrate before laying floor coverings.
Common mistake
Rushing to glue down parquet or paint before the substrates have dried. Finishes come loose, crack or grow mould, and the defect only shows after you have moved in.
Stage 15: Interior finishing and fit-out
The finishing stage shows how carefully the earlier decisions were planned. Before installation, agree materials, details, quantities and the delivery sequence, so that work does not stall waiting for products.
Bathrooms and other wet rooms need particular care: falls, waterproofing and hidden details should be accepted before tiling and installing fittings. Final fittings, the kitchen and built-in furniture are installed to actual dimensions, so measure once the substrates are finished.
Key decisions
- finishing materials and their delivery schedule;
- the waterproofing system for wet rooms;
- kitchen and built-in furniture designs that match the positions of electrical and water outlets.
Before moving on
- protect finished surfaces from later work;
- list any defects you notice and agree a deadline for fixing them.
Stage 16: External works, commissioning and completion
Before the garden is covered, make sure all current and spare networks are in place and marked on a plan. The levels, paving and planting must work together with the rainwater solution – water should flow away from the house, not towards it.
Completion is about proving not only that the equipment switches on, but that the whole house works as designed: the systems are commissioned, adjusted and documented. The required tests and the energy performance certification are carried out. For single- and two-dwelling houses, completion is formalised with a declaration of completion of construction (deklaracija apie statybos užbaigimą), submitted through Infostatyba together with the required documents, including cadastral data files. According to the State Territorial Planning and Construction Inspectorate, the building must be registered in the Real Property Register no later than 3 months after the declaration is registered.
Key decisions
- which tests, measurements and documents your completion procedure requires;
- when and how you settle with contractors – ideally once you have working systems, manuals, warranties and corrected defects.
Before moving on
- gather the cadastral survey, energy performance and other documents needed for completion;
- register the house and update your insurance and service contracts.
Stage 17: Handover to home maintenance
A construction project does not end with moving in, but with a proper handover to maintenance. Turn the handover documents into a practical register: which equipment is installed, where its manuals and warranties are, who is responsible for servicing it and when the warranty periods end.
The State Territorial Planning and Construction Inspectorate points out that the Civil Code sets warranty periods for construction work of 5 years, 10 years for hidden elements of the building (such as structures or pipes) and 20 years for deliberately concealed defects. The periods run from the day the results of the work are handed over to the client. If you notice a defect during the warranty period, document it and notify the contractor in writing.
Key decisions
- who will service the ventilation, heating, roof and rainwater system, and how often;
- where you will keep the design, as-built service drawings, inspection records and warranty documents.
Before moving on
- draw up a first-year maintenance plan based on the equipment manufacturers' instructions;
- close the construction project so that no work is left open, and create a separate maintenance plan for future recurring tasks.
Putting the plan into practice
A plan is most useful when it is alive: updated when decisions change, and keeping all important information in one place. A few habits greatly reduce the risk of mistakes and disputes:
- record decisions in writing – who decided what, and when – and keep them with the stage they belong to;
- photograph and measure any work before it is covered up;
- keep contracts, design revisions, inspection records and invoices with the work they relate to, not in chats or emails;
- before each stage, review what you need in place before moving on, and who is responsible for it.
Sources and currency
This guide was prepared in October 2026 and reflects the information published in official sources at that time. Construction regulations change, so check the current rules and consult a designer or another qualified specialist before making decisions. The guide is based on the following sources (most are available in Lithuanian only):
- State Territorial Planning and Construction Inspectorate: Changes to building permit documents from 1 November 2024 (2024-12-11)
- Ministry of Environment: Changes to the content of design proposals and technical working designs (2024-07-11)
- Ministry of Environment: Environmental, construction and land management changes from 1 January 2026 (2025-12-31)
- State Territorial Planning and Construction Inspectorate: What a structure is and why its category matters (2023-08-22)
- Territorial planning and construction portal (TPS "Vartai"): territorial planning documents, topographic data, building permit documents, notices of construction start and completion declarations
- National Land Service: Establishing and compensating land servitudes (2026-06-02)
- Lithuanian Geological Survey: Frequently asked questions (geotechnical investigations, registering wells)
- ESO: Connection conditions
- Ministry of Environment: Choosing individual wastewater treatment systems (2024-02-01)
- Bank of Lithuania: Planning to take out a home loan? (2026-07-29)
- Ministry of Environment: Newly built homes must now be energy class A++ (2022-02-02)
- Construction Sector Development Agency: Which buildings need an airtightness test? (2023-08-24)
- State Territorial Planning and Construction Inspectorate: Completing construction of a single- or two-dwelling house (2026-07-10)
- State Territorial Planning and Construction Inspectorate: Looking after a building after construction is completed (2023-06-06)